If you’re finding yourself teaching and learning in videoconferences these days (and with the COVID-19 pandemic closing schools worldwide and moving many schools online, like ours, that’s most of us in education) it can be very helpful to be able to play live video WITH NATIVE / line feed audio from YouTube or other sites in a videoconference. Whether you’re videoconferencing with Google Hangouts Meet (as we are mostly), Zoom, GoToMeeting, or another solution, sharing your microphone audio AND computer audio from a web browser like Google Chrome requires a bit of geeky tinkering. These audio channels have to be MIXED together / combined on your computer before being ‘sent out’ as a single source into a videoconference.
Fortunately, if you’re a MacOS computer user, there is an excellent solution and workflow for this. It will set you back about $100, but it works great. In this post, I’ll explain my home office / remote teaching audio mixing solution which uses Audio Hijack software ($59 – though you can pay less with an academic discount), Soundflower (free), and some tweaks to your MacOS security settings. If you’re not up for building a software installer via GitHub, you can pay $99 for Loopback. I’ve been using this setup daily for multiple videoconferences the past two weeks, and it works great.
Before jumping into these details, I’ll give a shout-out to the instructional technology / remote learning support website members of our school’s technology team have been building for teachers at our school the past month, and are continuing to develop: support.casady.org. Choose your interactive learning platform after indicating you’re an educator (Google Classroom or Seesaw) or skip directly to our instructional modules, which are useful with all learning management systems. Those include videoconferencing with Google Hangouts Meet, for “live” classes and office hours with students. Here’s how to setup your MacOS computer to share MICROPHONE audio + Browser audio (or another source) in a videoconference.
Step 1: Buy and Install Audio Hijack
The software which does most of the heavy lifting in this configuration is Audio Hijack by Rogue Amoeba. “Back in the old days of the web,” when “web 2.0” was a trending topic on MySpace and the webheads still walked the earth (knighted with their titles via the Webcast Academy), I first heard about the software along with Soundflower from Cheryl Oakes (@cheryloakes50) and her mighty podcasting / webcasting partners, “The Seedlings” of Maine. Back then, broadcasting a conference LIVE on the web required MAJOR digital tinkering and geekery. By comparison, what Jason Neiffer (@techsavvyteach) and I do on the EdTech Situation Room (@edtechSR) each Wednesday night via StreamYard looks like a process your average 5 year old could master with 30 seconds of direct instruction. This is all to say “We’ve come a long way, baby!” Webcasting and videoconferencing is more robust and reliable than it ever has been in history, but it still often requires “a geek’s touch” to get everything to work as it should.
Step 2: Install Either Soundflower or Loopback
Thanks to my friend and work/school colleague Eric Ebert (@biggestmeow), I was able to compile and install Soundflower from its new home on GitHub a couple weeks ago. It was one of the few times I’ve ever built an installer from sourcecode, and it’s honestly not something I could readily do without a lot of trial and error again or assistance. So if installing open source software from GitHub isn’t something you’ve done previously, you have two options for this second step:
- Get a friend to help you install Soundflower on your computer.
- Pony up the bucks and buy / install Loopback.
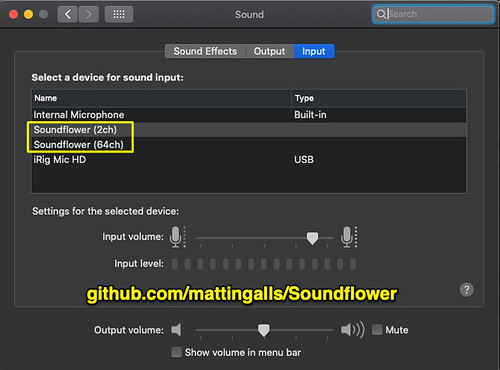
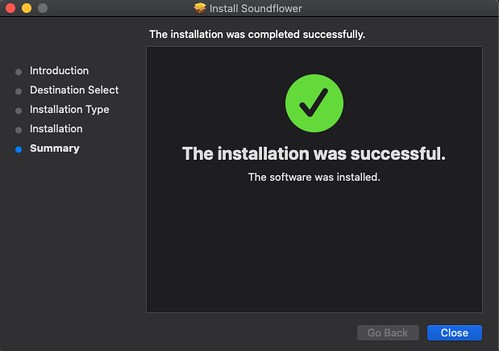
If you know another option, please share it in the comments or reach out to me on Twitter (@wfryer) or via my electronic contact form. Once you successfully install Soundflower on your MacOS computer, you’ll see two new sound input and output options. These are “virtual audio channels” which you can use for mixing and routing audio in creative ways on your computer, to “send out” into your videoconference.
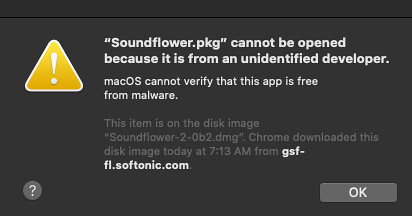
Fortunately (from a security standpoint) or unfortunately (from an ease-of-installation perspective) it’s now more difficult to install third party software like Soundflower on MacOS computers. You can read more about it on WikiPedia, but basically MacOS now has a feature called the “Gatekeeper” which protects most users / non-power users from different kinds of malware. Without taking additional steps to permit the installation and TRUSTING of third party software programs, they will fail to install on your system. This can be very frustrating.
This is where Loopback software comes in. If your geek quotient (like mine) is lower than what’s required to wade through installing from GitHub and bypassing the MacOS gatekeeper (which requires a few Terminal / command line inputs) and you don’t have a geekier friend who can do all this or advise you how to do it, just buy Loopback and install it.
Either way, now you’re ready for audio mixing.
Step 3: Configure Audio Hijack for Audio Mixing
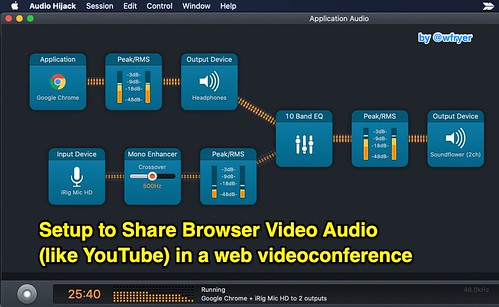
The last step is the fun part, and it reminds me of creating a recipe for IFTTT. (“If This Then That“) You will drag and drop different audio inputs, filters, and virtual device icons to create your desired audio workflow. This was my almost final Audio Hijack “session,” which I changed slightly by swapping the first “Application – Google Chrome” widget for “System Audio.” That way if I use a web browser other than Chrome in a videoconference, or play a media file from a program like QuickTime Player, it will also send its audio OUT to “Soundflower (2ch).” That Soundflower virtual audio channel is now my INPUT setting for my computer’s default audio and also for application audio, like Google Hangouts Meet conferences.
The main product page for Audio Hijack from Rogue Amoeba shows the basics of setting up “sessions” in the program. The biggest key is combining both your microphone audio with either application or system audio, and outputting that to Soundflower so you can use the mixed audio as a single input source in other programs / applications.
That’s it! I wish it was a little simpler, but I’m mainly glad that it works! If you’re a WindowsOS user, this 2017 article may help you figure out how to mix your audio channels, but I’m not sure if that’s still applicable for the latest builds of Windows10.
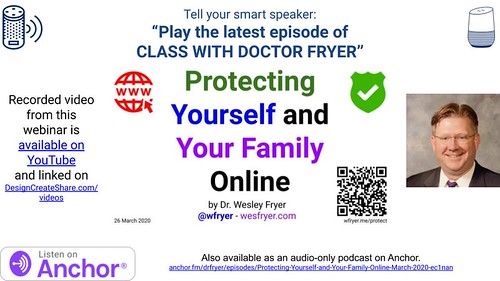
I’m now sharing audio from many of the evening webinars, weekend Sunday School classes, and (sometimes) weekday “genius bar” virtual workshops for our teachers on a relatively new Anchor podcast channel I titled, “Class with Doctor Fryer.” You should be able to ask / tell your home smartspeaker to “Play the latest episode of Class with Doctor Fryer” to hear it. It’s an eclectic mix of themes, so be ready for diverse topics!
Please let me know if this is helpful to you! Good luck with your remote teaching, learning, and videoconferencing!
If you enjoyed this post and found it useful, consider subscribing to Wes' free, weekly newsletter. Generally Wes shares a new edition on Monday mornings, and it includes a TIP, a TOOL, a TEXT (article to read) and a TUTORIAL video. You can also check out past editions of Wes' newsletter online free!
Did you know Wes has published several eBooks and "eBook singles?" 1 of them is available free! Check them out! Also visit Wes' subscription-based tutorial VIDEO library supporting technology integrating teachers worldwide!
MORE WAYS TO LEARN WITH WES: Do you use a smartphone or tablet? Subscribe to Wes' free magazine "iReading" on Flipboard! Follow Dr. Wesley Fryer on Twitter (@wfryer), Facebook and Google+. Also "like" Wes' Facebook page for "Speed of Creativity Learning". Don't miss Wesley's latest technology integration project, "Show With Media: What Do You Want to CREATE Today?" from Moving at the Speed of Creativity https://ift.tt/2wJqZdP
via IFTTT
Comments
Post a Comment